


Summary: To easily add a Google review widget to your WordPress website, follow these steps: 1) Log in to your Sprypt Review Manager dashboard. 2) Add your business and connect your Google My Business account. 3) Customize your widget's appearance with brand colors and layout options. 4) Copy the widget code and embed it into your WordPress site using a Custom HTML widget or directly on a page. For enhanced review management, consider using Sprypt's additional features like review campaigns and automated reply generation.
Displaying your customers’ Google reviews on your website is a powerful way to build trust and boost conversions. With Sprypt Review Manager, it only takes a few clicks to create a beautiful, customizable review widget for your WordPress site. Here’s how to do it:
1. Log In to Your Review Manager Dashboard
First, head to reviews.sprypt.com/login and sign in with your credentials.

If you’re new to Review Manager, you’ll see an option to add your business right away.
2. Add Your Business
If you haven’t connected your business with Review Manager yet:
- Type in your business name exactly as it appears on your Google My Business profile.
- Select your business from the search dropdown that appears.
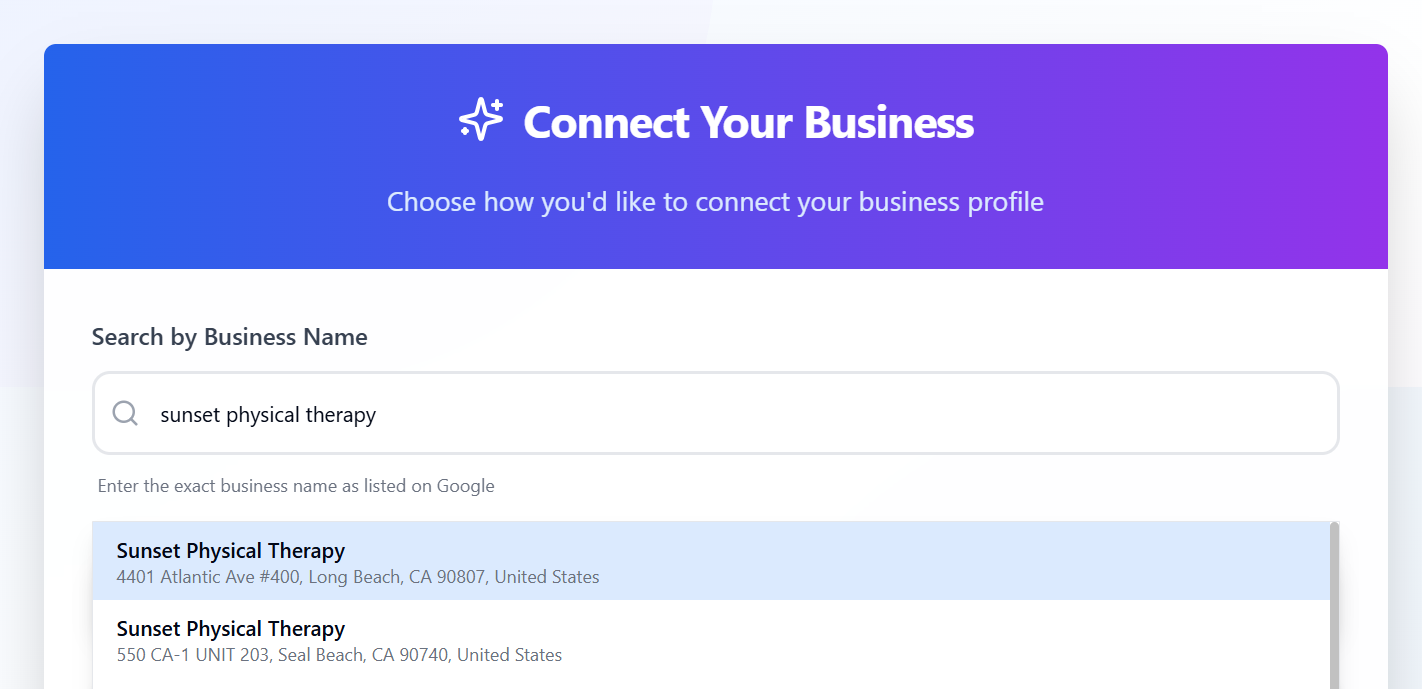
You’ll be taken straight to your personalized review dashboard.
3. Connect Your Google My Business Account
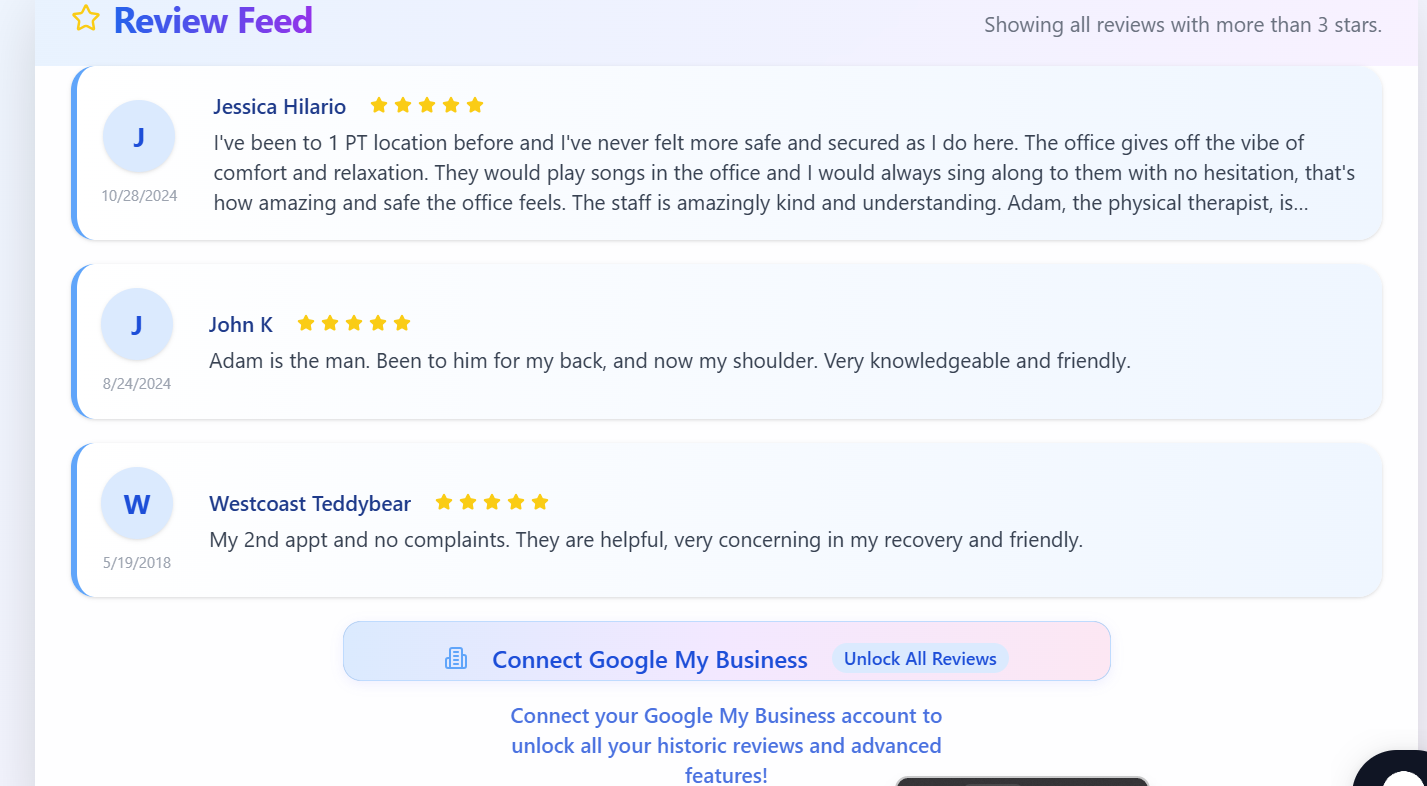
You’ll see your most recent reviews right away, but to display all of your historical reviews, simply follow the on-screen prompt to connect your Google My Business account. Once connected, Review Manager will fetch and display all your reviews in one place.
4. Customize Your Google Review Widget
Now comes the fun part—making the widget match your brand!
- In the sidebar, click on Publish on web.
- You’ll see a live preview of your review widget. Here you can easily adjust:
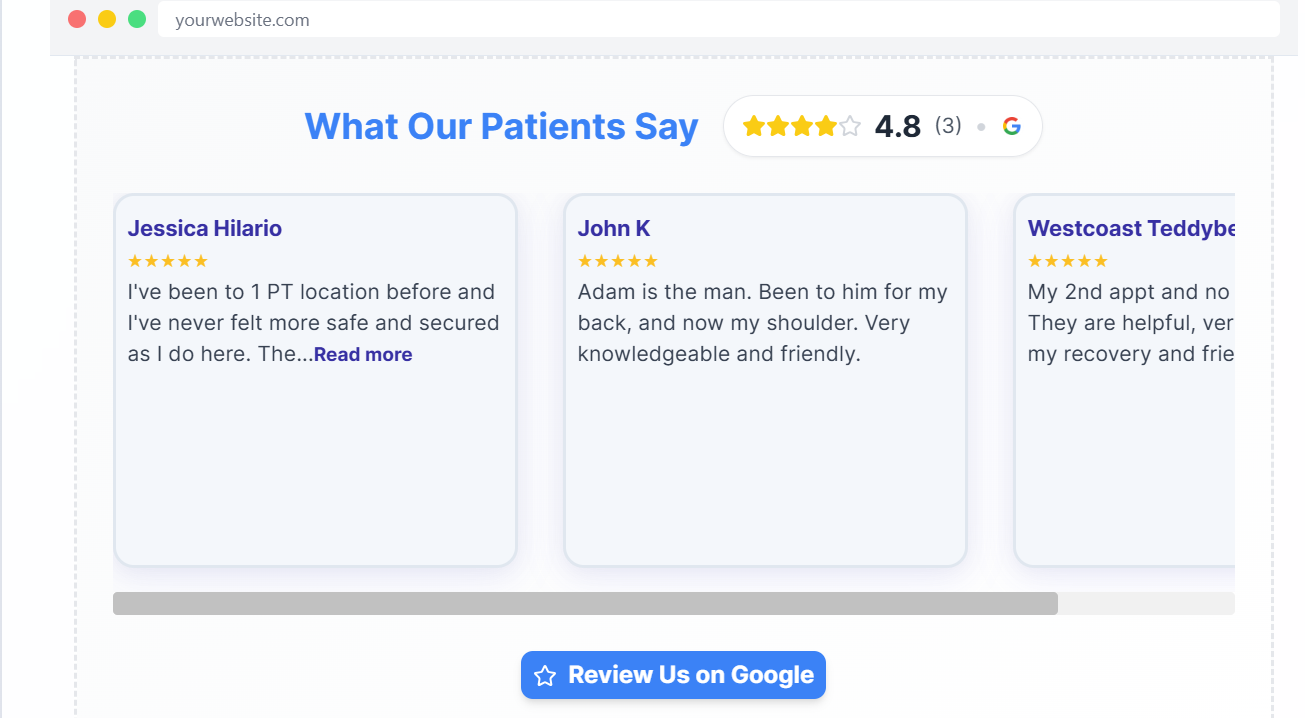
- Primary and Secondary Brand Colors
- Heading Text
- Font Family
- Border Radius
- ...and much more!

Want more control? Dive into the advanced settings:
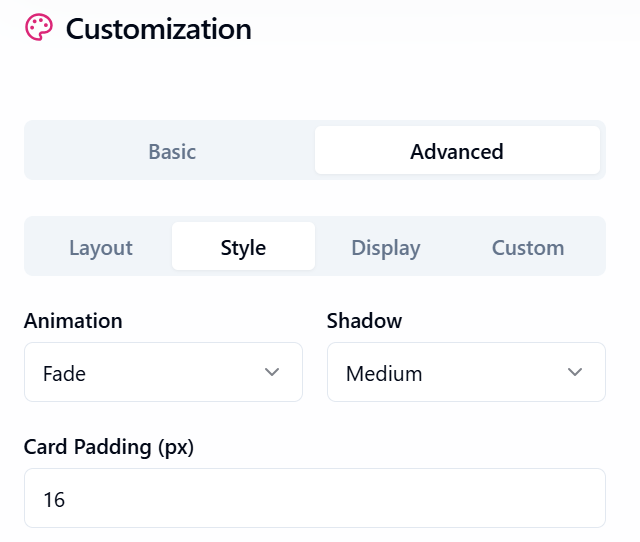
- Layout: Pick from carousel, list, grid, or testimonial styles, adjust the number of reviews shown per row, card spacing, and set the max width.
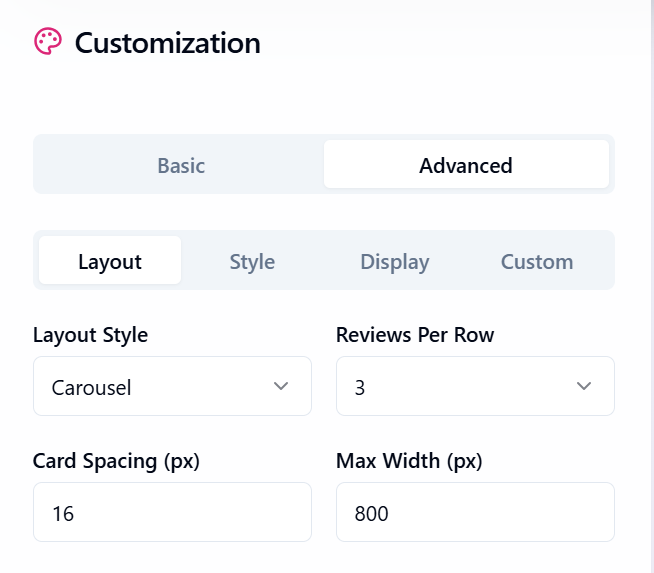
- Style: Add animations (fade, slide, bounce), tweak shadows, and adjust padding.
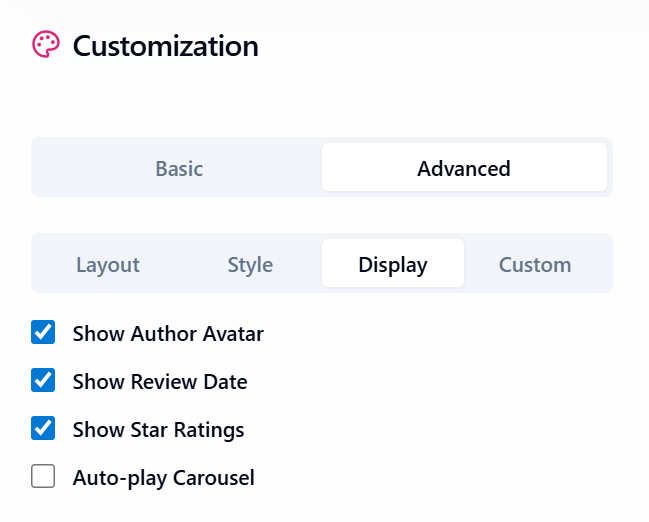
- Display Controls: Show or hide the author avatar, review date, or star ratings. You can even enable auto-play for carousels.
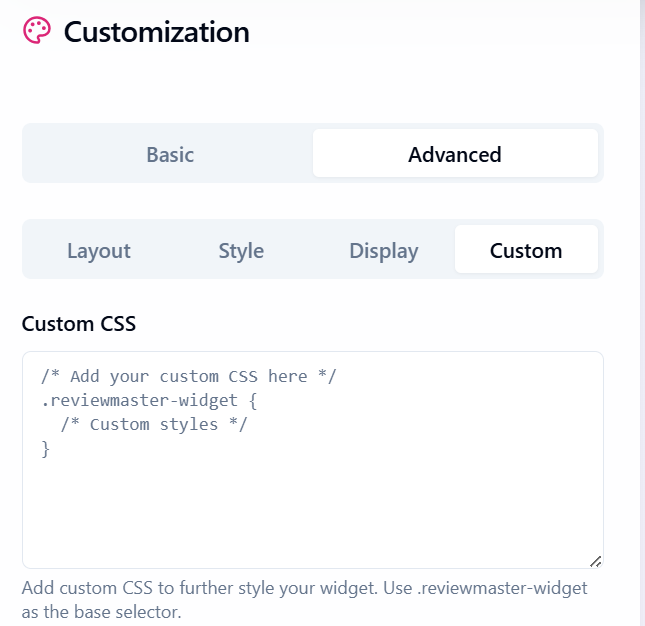
- Custom CSS: For the pros who want pixel-perfect customization! Just use
.reviewmaster-widgetas your base selector.
Every tweak you make updates the widget preview in real time—so you know exactly how it will look on your site.
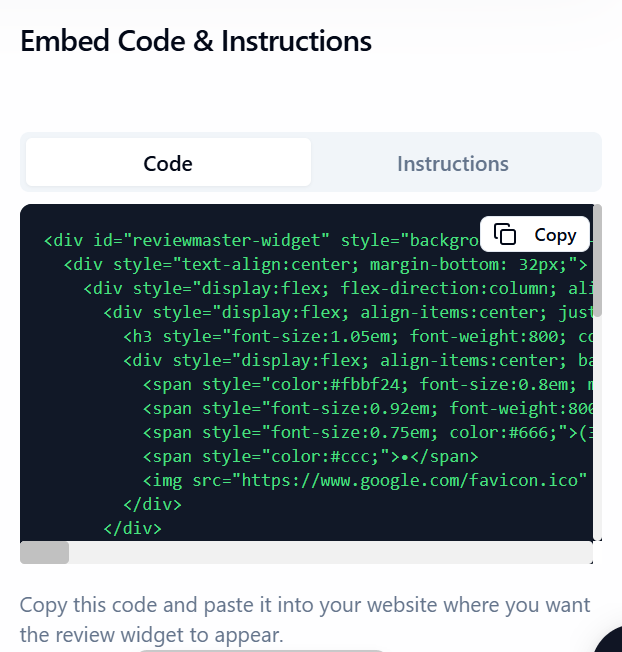
5. Copy Your Widget Code
Satisfied with your widget? Scroll to the code box beneath the preview and click to copy your widget code.
6. Add the Widget Code to Your WordPress Site
Here’s how to embed your review widget, no matter where you want it on your site:
a. Add to Sidebar, Footer, or Widgets Area
- Log in to your WordPress admin.
- Go to Appearance → Widgets
- Drag a Custom HTML widget to your desired section (sidebar, footer, etc.)
- Paste your widget code, and click Save.
b. Add Directly to a Page or Section
- Edit the page (or post) where you want to show reviews.
- Add a Custom HTML block (in Gutenberg or your page builder).
- Paste your widget code and Publish/Update the page.
c. Add with Elementor, WPBakery, or Other Page Builders
- Simply use the HTML or Code element, then paste your widget code.
d. Add to Theme Files
(Advanced users only)
- Go to Appearance → Theme Editor
- Paste your code into the appropriate file (like
footer.php), then save.
Tip: Always preview your site before going live to make sure the widget displays perfectly!
More: Supercharge Your Reviews with Sprypt
Review Manager doesn’t stop at just displaying your reviews. Here’s what else you can do:
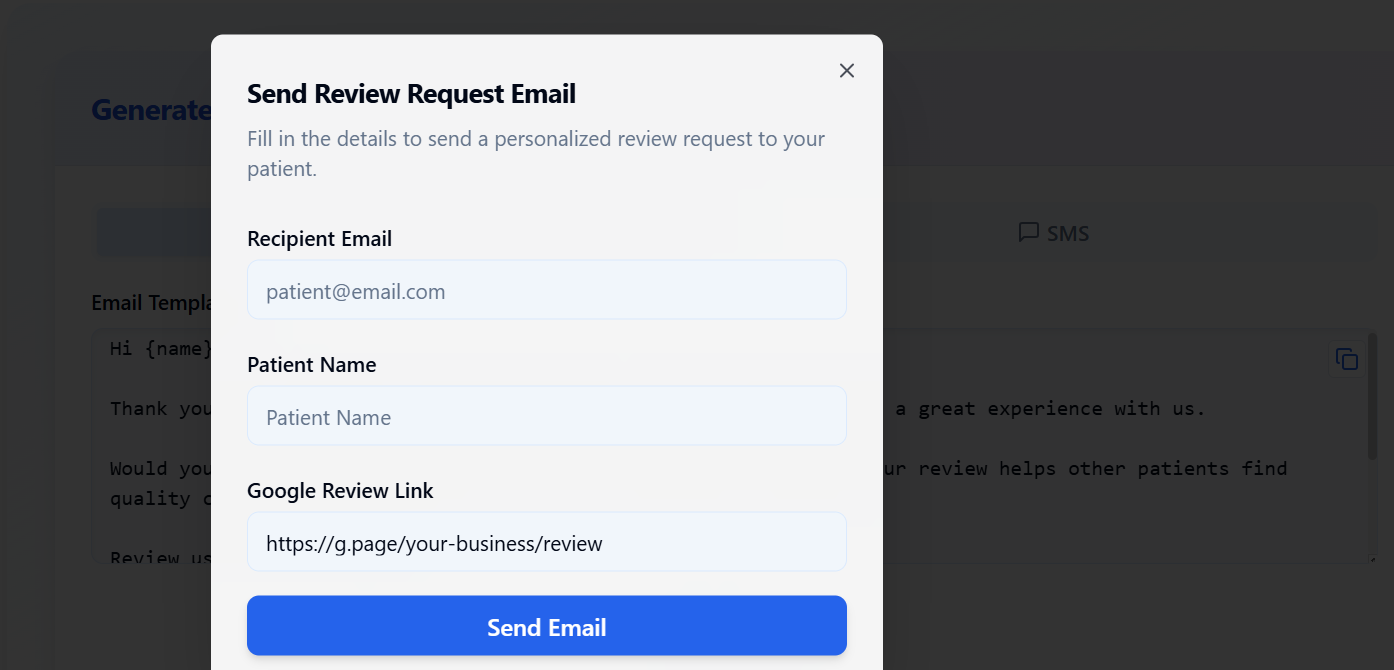
1. Run Review Campaigns
Send email invitations for reviews directly to your patients or clients using Sprypt’s easy, customizable email templates—all from your dashboard.
2. Generate Review Replies
Responding to reviews just got easier—generate recommended replies instantly!

Want more tips, or need extra help? Check out Review Manager documentation or customer support. Show off your earned trust—put your Google reviews front and center on your website today!

Join 500+ clinics using SPRY to save time, increase revenue, and provide better patient care.
Book a DemoReduce costs and improve your reimbursement rate with a modern, all-in-one clinic management software.
Get a DemoLegal Disclosure:- Comparative information presented reflects our records as of Nov 2025. Product features, pricing, and availability for both our products and competitors' offerings may change over time. Statements about competitors are based on publicly available information, market research, and customer feedback; supporting documentation and sources are available upon request. Performance metrics and customer outcomes represent reported experiences that may vary based on facility configuration, existing workflows, staff adoption, and payer mix. We recommend conducting your own due diligence and verifying current features, pricing, and capabilities directly with each vendor when making software evaluation decisions. This content is for informational purposes only and does not constitute legal, financial, or business advice.


